
Stop Copying and Pasting One Thing at a Time: The 2-Key Windows Shortcut You Need

Here is a scenario that happens to almost everyone at least once a day: You copy a tracking number, get distracted for five seconds, copy someone’s name, and suddenly realize your tracking number vanished into thin air.

Now you’re stuck clicking back and forth between two browser windows, juggling tabs, and doing the slow Ctrl + C and Ctrl + V shuffle like it’s 1995.

You don’t have to do that anymore. Windows has a built-in multi-item memory bank that remembers everything you’ve copied—text, links, addresses, and screenshots. You just have to turn it on with one keystroke.


The Magic Shortcut: Windows Key + V

Most of us have muscle memory for Ctrl + V. But if you swap that Control key for the Windows logo key, something completely different happens.

Press Windows Key + V right now.

If you’ve never used it before, a small popup panel appears near your cursor asking if you want to Turn on Clipboard History. Click Turn on. That is the only setup required—ever.


3 Ways This Saves You Serious Time Every Day

Once Clipboard History is running, here is how your workflow changes:

  1. Copy 10 Things in a Row Without Pasting: You can copy an address, an email, a phone number, and a product code one after another without switching windows. When you get to your spreadsheet or form, press Windows + V and pick whatever you need from the list.
  2. Access Recent Screenshots: If you take a screenshot using Windows + Shift + S, it saves directly into your Clipboard History panel too. No need to save a temporary image file to your desktop just to paste it into an email.
  3. Pin Things You Type Constantly: Have a meeting link, boilerplate reply, or work ID you type twenty times a week? Hover over it in your clipboard list and click the little Pin icon. Even when you restart your PC or clear your history, pinned snippets stay right where you left them.

Quick Privacy Note: If you copy a sensitive password or credit card number, just tap Windows + V, click the three dots next to the item, and select Delete. You can also hit Clear all at the top whenever you want a clean slate.


What About Mac Users?

If you’re on macOS, Apple doesn’t have this built natively into the keyboard yet without third-party utilities. Free, open-source utilities like Maccy or Raycast give Mac users the exact same superpower without bogging down your system.

For everyone on a Windows laptop or desktop: hit Win + V today. Once you get used to it, going back to a single-item clipboard feels like typing on a typewriter.
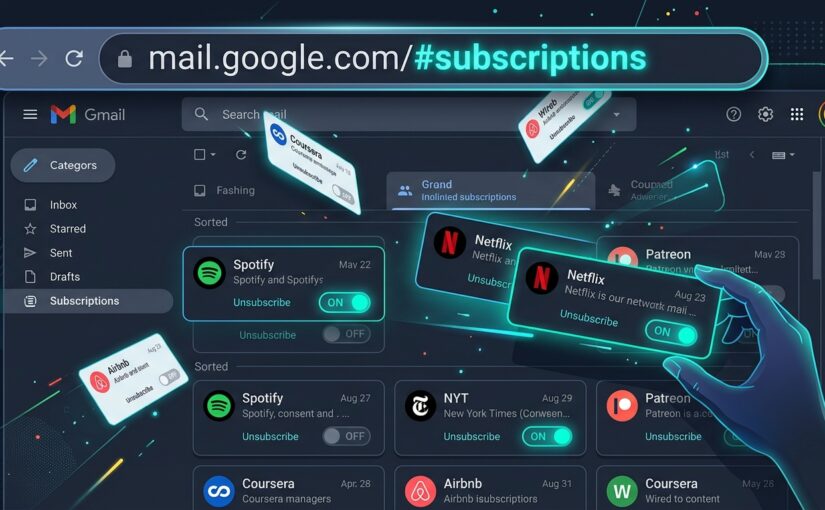
Type 3 Letters in Your Gmail URL to Instantly Clean Up Junk Mail

If your Gmail inbox looks anything like mine on a Monday morning, it’s probably drowning in a sea of promotional flyers, automated newsletters you don’t remember signing up for, and daily “deals” you never asked to see.

Most people handle this in one of two ways. Either they give up and let thousands of unread emails pile up forever, or they waste hours opening individual emails, scrolling to the bottom, squinting for the tiny gray “unsubscribe” link, and praying it actually works.

Some folks even turn to third-party inbox cleaner apps. Please don’t do that. Handing a random app full read-and-delete access to your private email just to clear out spam is a privacy nightmare waiting to happen.

There is a much cleaner way. Google built a native subscription manager right inside Gmail—and you can jump straight to it with a dead-simple three-letter URL trick.


The 3-Letter Address Bar Trick

You don’t need to dig through buried settings menus or wait for a sidebar rollout. You can trigger the dashboard instantly right from your browser.

Here’s all you do:

  1. Open Gmail on your computer browser.
  2. Look up at your browser’s address bar. The URL normally ends with something like:
    https://mail.google.com/mail/u/0/#inbox
  3. Highlight just the word inbox at the very end and replace it with sub.
  4. Press Enter.

Your address will now read: https://mail.google.com/mail/u/0/#sub.

Instantly, Gmail bypasses your inbox feed and opens the hidden Manage Subscriptions dashboard.


What the “Manage Subscriptions” Hub Actually Does

Once you’re in, Gmail gives you a clean, bird’s-eye audit of every sender blasting your inbox. Google categorizes them by volume so you can spot the worst offenders immediately:

  • High-Frequency Spammers: Senders bombarding you with dozens of emails a month get flagged right at the top.
  • Estimated Message Count: You’ll see roughly how many messages each sender dumped into your inbox over the recent quarter (e.g., “10+ emails/quarter”).
  • 1-Click Native Unsubscribe: Next to each sender is an official Unsubscribe button. Click it, and Gmail handles the server-level unsubscribe request automatically—without redirecting you to some shady third-party confirmation page.

Pro-Tip: If you use multiple Google accounts (like a work account and a personal one), the number in the URL (/u/0/ or /u/1/) tells Gmail which profile you’re looking at. Just leave the number alone and only swap out the word after the hashtag.


Why You Should Ditch 3rd-Party “Clean Your Inbox” Tools

As an IT specialist, one of the most common issues I see on personal laptops is folks granting OAuth tokens to sketchy “Inbox Cleaner” web apps. Years ago, researchers caught popular inbox cleaning services harvesting user emails and selling anonymized shopping data to marketing firms.

You don’t need them. Using Gmail’s native #sub view gives you the exact same bulk-cleanup power, keeps your data strictly inside your existing Google account, and takes less than thirty seconds to run.

Try typing it into your browser bar right now. You might be surprised at who has been filling your inbox without you noticing.